Fitting My Washi Dress

When Phee Fabrics started stocking Art Gallery Fabrics in 100% premium cotton OEKO-TEX certified fabric, I knew it was time to search for a new pattern.  I have a couple of woven dress patterns that I like, (blogged here) but they are quite similar, and I wanted something with a little more detail to showcase the pretty fabric.

One of my sewing friends who also likes dresses, suggested a few pattern companies to me.  She forewarned me that the patterns were not inexpensive, but felt that they were worth the money.  I scrolled through a few companies, and kept coming back to the Made By Rae Washi Dress.  The simple pleats, neck detail, and of course- pockets, spoke to me.

Whenever I get a new pattern (especially for wovens), I like to compare it to a pattern that I know fits me well, to see how similar or different the fit is.  Since wovens don’t have any give, making sure that you’ve got a good fit is very important!  Right away I could tell that this pattern was drafted for a much smaller cup size, so I knew I was going to have to do some work to get a perfect fit.  I traced the bodice and taped the dart together, and held it against my body to see how far off the fit was.  The dart ended up a couple of inches above my bust apex, and the bodice didn’t cover the bottom of my bust.  Sigh!

Washi bust

Since this is kind of a common issue for me with woven patterns, it wasn’t exactly unexpected.  I needed some length between the armscye and the dart, so the simple fix was slashing the bodice front and adding in a 1.5″ wide strip of waxed paper.  I also added 1.5″ length to the pattern back.

Washi pattern adj

I cut out a bodice front and the upper back of the pattern in some cheap fabric and basted it together to check my fit.  I decided another half inch added to the front at the shoulder seam would give me that extra little bit I needed, and cut into my good fabric.  I took some time with my pattern layout, because every sewist knows that if you’re working with a floral fabric, it’s nearly impossible to avoid having flowers on your bust.  And I wanted an intentional placement versus an awkward one! 🙂

The pattern tutorial suggests using interfacing on the front around the U-notch to help keep the corners laying smoothly.  Tracing around the stitch line gave me the perfect shape to iron on to the bodice front.

Washi interfacing

It also calls for facings at the front and back neckline, and bias trim along the armscyes. But a finished bodice lining is just so much nicer, and would also make it easy to stitch a couple of lines 1/2″ apart across the back to make a casing for my elastic.  To make a bodice lining, cut another bodice front, and cut a bodice back by folding the pattern back 1/2″ below the bottom shirring line marking.  Sew the front and back linings together at the shoulder seams.  Sew the bodice front and dress back pieces together at the shoulder seams.  Place the lining over the dress, right sides together, and stitch around the neckline.  Clip the curves, turn right side out and press.

Then you will need to “burrito roll” the bodice to sew the armscyes.  If you’ve never done the “burrito roll” method, it’s almost magical how it works!  Basically you are rolling the garment up from one side, then flipping the opposite sides over and around (enclosing the rolled portion in the shoulder strap area) and stitching the armscye, then pulling it through.  There are plenty of video tutorials online if you are a visual learner.  Again you will clip the curves, turn the bodice right side out and press carefully.  Stitch the side seams and press.  Turn the bottom edge of the lining under 1/4″ and press.

You’re supposed to do 5 or 6 lines of shirring along the back, to give a nice fitted look.  Since shirring didn’t really sound fun, and wasn’t the look I was going for, I opted to use elastic in a casing.  Keeping your fabric smooth, stitch the bodice back lining to the dress back along the bottom two marked shirring lines.  This will give you the casing for the back elastic. To determine the proper length of elastic, measure your body around the bottom of the bodice.  Divide the measurement in two, and use 3/8″ wide cotton swimwear elastic, marked at that length.  Thread the elastic through, stitching it in place at both ends.  Then stitch the bodice front lining in place by stitching in the ditch along the front seam line.

The interior back bodice:

Washi int backThe interior front bodice:

Washi int front

Can you see why lining the bodice is worth the effort?  There is just something so satisfying about a garment that is as nicely finished on the inside as it is on the outside!  You can always feel proud about making a quality garment that will last!

Washi frontWashi back

I love my new dress!  And it has pockets!  It’s cool and comfortable, and can be layered under a jacket or cardigan for year round use.

Washi pocketsWashi down

Using a blind hem stitch on my sewing machine was the only way to do the hem.  It’s a nice deep hem, folded under an inch, zigzagged and pressed, then folded under another two inches.  It reminds me of the type of sewing my beloved grandmother used to do. ❤  High quality fabrics, quality finishes, and a nice deep hem.

Now that I’ve got my pattern perfected, I need to decide on some more Art Gallery Fabric so that I can make another dress!

As always, I only give my honest opinion.  After all, my post represents me! 🙂  Thank you for reading and sharing my love of sewing, patterns, fabric, and pattern hacking.❤

Transitional Outerwear: A lightweight LoneTree Vest using Stretch Twill

I am a cold weather person through and through. Long sleeves, high necks, big scarves, and bundling up are some of my favorite things and when the weather turns colder nothing gets me more excited than layering as many me-mades on my body at one time as possible. Last year I made a handful of jackets. This year it was time to branch out just a little bit farther and make a vest!

I found this LoneTree Jacket. It ranges in size XS – 4X, comes in vest or jacket versions and drafted for Stretch Twill. Phee Fabrics introduced this fabric base in the spring of 2019. It has a slight 4 way stretch, is moisture wicking, quick drying, great drape without losing it’s shape, wrinkle resistant and machine washable. While using it for summer sewing I couldn’t wait to see how it would transition into fall sewing.

I worked it up in the Black Stretch Twill (other colors are also available. Check them out here). I adored how quick and easy it was to put together. Unlike with the jacket version of this pattern I did not need any alterations for the vest version and made a straight size XXL (my measurements are 44,34,45).

I did choose to leave off the upper pockets because my boobs are large enough and we dont need any additional fabric or attention in that area!

If you haven’t gotten a chance to sew with the Stretch Twill from Phee Fabrics yet, it is one of the easiest woven fabrics I have had the pleasure to sew with. Normally I am a knit person and have at least twenty garments hanging in my closet made out of the Phee rayon spandex. I typically avoid sewing woven patterns if at all possible. Woven fabrics don’t stretch like knits. The fit in knits tend to be more forgiving, Phee Fabrics stocks plenty of high quality knits, make sure to check them out. Woven’s usually require zippers, which I abhor. We all have our thing, amirite?

The Phee Stretch Twill has a 4 way stretch of 10% in each direction. Which means it is much easier to fit garments made out of it! It also sews and presses like a dream which makes the fiddly construction of things like this vest easy and painless.

When I first made this pattern I jumped right in with the full jacket version and had a bit of a time trying to fit the sleeves for me and it put me off from the pattern altogether for a while. If you are new to sewing, interested in a beginner outerwear pattern then I definitely think this vest is the way to start! Plus, the drawstring waist makes this one easy to fit, which I think also makes this a great first outerwear piece.

Happy sewing!

Facing my Sewing Fear of Zippers

I never thought I’d be saying this but there are some things in the sewing world that scare me – like full stress and panic, clenched teeth, sweaty palms. So what do I do? I avoided them like the plague. And the one that really sets me into a tailspin – ZIPPERS!! Who knew something so innocent as a zipper could cause such angst!

In the past, I would seen a cute jacket or sweatshirt and there it would be, staring at me with it’s shiny teeth – the dreaded zipper! So I would do what any logical person would (absolutely not logical!) and first buy the pattern, print, tape and grade my size, buy oodles of @pheefabrics to make said project and finally stash it away for a future date when I would miraculously no longer fear the zipper.

The time finally has come – too many patterns sit sadly waiting to be sewn. I have wanted to make a jacket with @pheefabrics Supplex for the longest time. With fall creeping into the Northeast, I wanted to make one more than ever.  So first I headed to the Phee Fabrics Facebook group for moral support and then to this blog post on installing zippers on knits. 

IMG_20191005_145432

I was armed and figured if I was going to try and learn a new skill, I might as well go all in and found a pattern that had not one, not two but THREE ZIPPERS! The Evergreen Jacket from Hey June Patterns has a plethora of cool add-ons, but I was most interested in having a two tone affect with the bias zip and collar. I love the look of black, red and gold accents  – so cherry and black Phee supplex were the answer. 

I have never sewn a jacket, or any top for that matter, in @pheefabrics Supplex and now I feel like I have really been missing out! Phee Supplex is not only a game changer for leggings but also the exact weight and look I wanted in a jacket. It has a sporty feel and great weight for a seasonal transition piece. And since it’s not bulky, I can wear it throughout the colder months under my huge “I live in a cold place and on’t care if I look fashionable so I don’t freeze” winter coat 🙂

So off I went with my pattern and fabric, zippers and seam ripper (that got used far more than I care to admit) but I was determined. 

IMG_20191015_144934
Happy mid project progress selfie

Here’s what I found from my experience with sewing this jacket and zippers:

  1. DO NOT RUSH! If you have an appointment or are tired or stressed that day, it’s not the time to start on this project. I think jackets in general require some care and attention – after all these are more involved in construction than many of the other patterns I have sewn.
  2. In the same vein as above, take it SUUUUPPPERRR SLOOOWWW when actually working with the zippers. The entire project can be made on a regular sewing machine using a basic straight stitch (if you are using Supplex which does not fray). Do you see that little slider for speed on the needle, move it all the way to the far left (or the slowest speed possible on your machine.) This may seem a bit excessive, but even with it all the way down, the zippers will only take a few minutes to stitch in. This helps to prevent breaking needles (none were injured in the making of this jacket) and straight stitching.
  3. IMG_20191010_115727
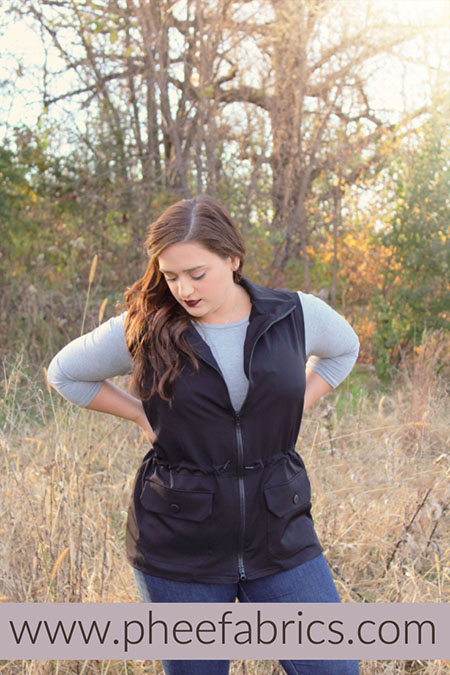
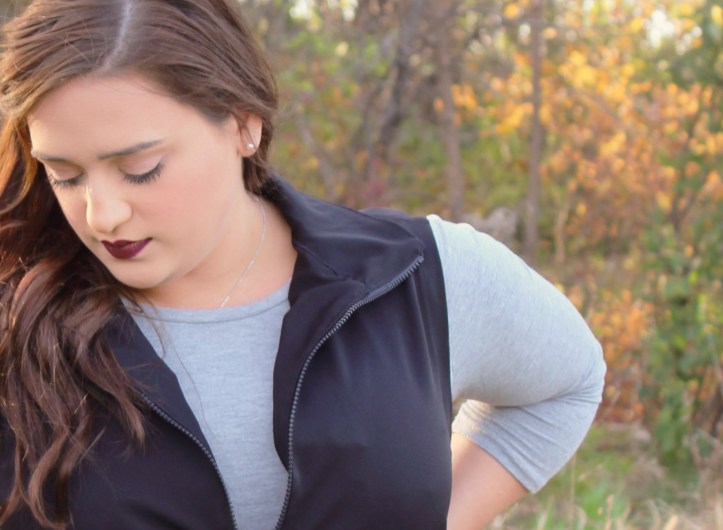
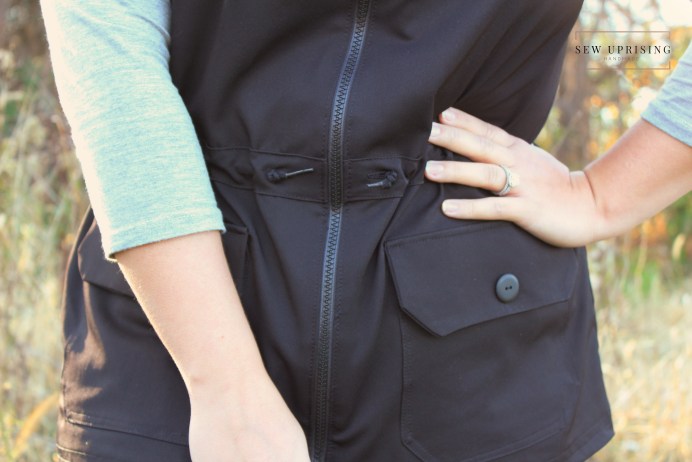
Use a zipper foot (if one is available)  – here is a close up of mine on my machine. If you do not own one, it may be possible to complete this jacket since the seam allowance is ⅜” but I would highly recommend trying to find one that will fit your machine. It really makes life easier.
  4. There is no such thing as too many pins. This really helps keep things straight and prevents the fabric from stretching and bunching when you are sewing.
  5. Make sure to read through the entire pattern first (this goes for any time you sew) – you can see here where I sewed the zipper into the wrong seam and had to rip EVERYTHING OUT! No fun!

I hope this helps you feel less intimidated by zippers and encourages you to try out something a bit more challenging – the result, in my opinion, is totally worth it!

-Liz-

*** Please note – This blog contains affiliate links to products that I love and trust, and know you will as well. By using these links you are helping to support me, with no additional cost to you, while I continue to inspire your sewing adventures***

A Cozy Pinspiration Hack

For the last year I’ve been wanting to create this pinspiration and I just never got around to it. I’m a big pullover/jacket fan. I wear them most of the year. Something that I can wear over a tank or throw a jacket on over top, on those super cold mornings.

Back when I was testing the Nova Raglan by Sinclair Patterns) all I could think about was that pinspiration pic from last year. The Nova comes with a bunch of options. Cowl, hood, kangaroo Pocket, etc. Definitely check it out.

That was also my first time using the cozy French terry from Phee Fabrics and it was love! This stuff isn’t super thin and flimsy like some I’ve tried. The word “cozy” describes it perfectly. The fleece backing is so soft and lush. It’s warm but not too hot, and it’s so easy to work with. Everytime I wear anything I’ve made with it, people are always shocked I made it. Then they have to touch it. I’ve been really happy with how it holds up too. For this one, I used the Light Heathered Gray and Dusty Denim. So if you’re looking for great french terry, check this stuff out.

Here’s my disclaimer! There are tons of mistakes. Things I didn’t think through fully and things I need to think about a little more. Lots of seam tipping was done. However I do still love it!!! You can also probably tell when I had to tell my kid to stop screwing with it as I was sewing.

I used a 7” zipper, which I think is fine for me but you could use a 9” if you wanted. You’ll need the front, back, sleeves, cuffs, and a waistband if you choose. The cowl neck, I winged my own. I wanted it similar to my Patagonia so I measured the the height on that and the width across on the cowl pattern piece. I came up with a width of 19” and 4.25” high. I cut one in gray and one in blue but you could easily double that height and cut just one color.

I assembled the shirt except for the seam where that zipper will go and that sleeve/side sleeve. You’re going to attach the cowl to it. I left it all open and just tried to quarter the cowl and the neck of the shirt. For my cowl, I did 2 colors so I had a different color on the inside. So I serged those together first.

You’ll place the cowl right sides together, with it evenly stretched and serge.

I would highly suggest adding some interfacing. Which I intended to do, like I always do when I put a zipper in a knit project. But I couldn’t find mine. I just bought it and I can’t figure out where my husband put it. I would’ve just done some strips on either side of where the zipper was going. Now that I’m done, it will show up. Every.freaking.time!

I’m not going to go into the do’s and don’ts of adding a zipper to a knit fabric because there’s already a phenomenal blog on the Phee Blog about it. It’s a great read!

The top edge of the cowl that’s going to fold over, you can fold 1/4” and press. You’ll need to go back and sew that edge at the seam where you attached the cowl later.

This is where we add the zipper. As far as placement, I started my zipper right around what would be the middle of my cowl.

Make sure everything lines up after you baste that zipper in place.

Then we are going to finish that seam and the side seam. You could also baste that in place before hand. I did it both different ways since I seam ripped a few times.

Once your zipper is in, you’re going to fold your cowl down and top stitch the zipper and then the edge where the cowl and the shirt meet. Remember, we are tacking the inside of the cowl down.

I top stitched my cowl and I like how it turned out. For the cuffs, I did the same as the cowl, with both colors. I chose to hem the bottom rather than add a waistband.

This slideshow requires JavaScript.

That’s it! Super easy! Just required a little more focus from me. My next one will be much smoother and much better. I can’t wait to wear this one tomorrow morning! Thanks for reading!

Jessica

The Month of Free Patterns

During the month of September 2019 the team at Phee focused on free patterns. The only rules were that the pattern had to be free and utilize Phee Fabrics.

Here’s the thing, the team at Phee works extremely hard behind the scenes to bring everyone all the best of their work. Now, we know the quality at Phee is consistent, so you know what you’re going to get. Pattern designers work hard also and a lot of designers draft with their body shapes in mind and adjust the sizing based on their size block. There are very few designers that take multiple body shapes into account. One of the most challenging things for new and frustrating for experienced sewists is to adjust a pattern to their body. Dealing with an awkward fit and then comes in the concept of making a “muslin”. Typically muslin is a type of fabric but it can also be used to refer to the first one you make, a trial of sorts. Through multiple places I see people asking about using a different fabric as a “muslin”, a cheaper or different base. That will result in a different fit (be forewarned). Another thing that draws people in is FREE! The idea of getting something for free is appealing, it gives you a chance to try a pattern designer before purchasing other patterns from them. These are some of the free patterns our dedicated sewists have worked up for you.

Crystal is wearing the Halla Slim fit Dolman with the Poveglia Ribbing. She made a size 6/8 but says that it’s loose and should have made the size 2/4
Jessica is wearing the Harper Cardigan by Sinclair Patterns with the Light Gray Heathered Cozy French Terry.
Stephanie is wearing the Peg Legs from Pattern for Pirates in olive supplex
Mala is wearing the Magnolia Tee by Sonia Estep Designs in Dark Bisque Rayon Spandex. She graded from a size 22 to a size 26
Elizabeth is wearing a Durango Tank by Hey June in the 13 oz. Cherry Rayon Spandex
Addy is wearing the Verona dress by Little Lizard King in Orchid Rayon Spandex. This pattern is drafted for woven but was made in the same size. While slightly larger it will be good for layering a shirt and/or leggings underneath, as well as next spring/summer.
Joelle is wearing the Thankful top by George & Ginger. This is not available on their website and only can be found in the files of their facebook group.

The slouchy beanie was a free tutorial by Bernina
Due to the ease of the pattern and not wanting the shoulders way too wide, she made a size 8, graded to 10 waist and 6 hips. 

Removed an inch above bust and an inch above hem. Size 8 sleeve, removed .5” in the head and an inch at the short sleeve mark.
Nicole is wearing the Agnes Dress by Halla using the navy rayon spandex

If you have any other free patterns that you have used with Phee please email us at customer.service@pheefabrics.com to be added to this blog

Leggings Party

I’ve wanted to write a leggings comparison blog for FOREVER. I recently had my daughter and knew I wanted to wait until she was out of me to hopefully get the best fit for my post partum body. I used Phee supplex for all of them and 6 different leggings patterns.

https://pheefabrics.com/supplex/

I compiled some info to compare all of the patterns. The calf and thigh circumference are of the pattern pieces and the thigh measurement is taken from 6 inches down the inseam. The waistband height is of the pattern piece minus seam allowances and the width is taken from the center of the pattern pieces.

DIBY Anything But Basic Leggings

Stretch Required: 50%

Size made: 12 + 2.5 inches based on thigh placement

Drafted Height: 5’5

Calf Circumference: 11-3/4

Thigh Circumference: 16-1/4

Waistband Height: Tall: 3-1/8 Short: 2-1/8

Waistband Width: 27-1/4

Pocket Size: No pocket

Extra Options: None

Types of Waistbands: Short/Tall

Dislikes: Crotch and butt curve really flat/wide hip/minimal options

Size Range: 34-67 inch hip

Gusset: None

Comments: There is a very pronounced hip curve that after wearing caused some rippling the waistband also constantly rolled down. If someone had more around their hips I would recommend using this pattern and then using a waistband from another pattern. The ease throughout the legs is really comfortable and DIBY does have the most expansive size range.

Apostrophe My Fit Leggings

Stretch Required: You pick

Size made: Side pocket panel, 24 inch inseam, contour waistband, snug fit

Drafted Height: Custom

Calf Circumference: 14-3/8

Thigh Circumference: 21-1/8

Waistband Height: Contour: 3-1/2

Waistband Width: 25

Pocket Size: 6-1/4×3-1/2

Extra Options: Ruched side/Side panels/pocket/waistband pocket/different waistbands/completely customizable

Types of Waistbands: Elastic/Yoga/Contour/Back pocket

Dislikes: There isn’t a % of ease given for your measurements so mine didn’t turn out how I like

Size Range: All

Gusset: None

Comments: The directions for how to find your measurements are great and I really appreciated that but I was initially frustrated that the ease isn’t given for the different fits. I chose the snug fit and they are very large around my knees and calves with about a 1:1 ratio. They have a lot of potential and are completely customizable but I don’t know if I have the patience to work them out.

Greenstyle Strides Updated

Stretch Required: 50%

Size made: L cropped length, high rise

Drafted Height: 5’8

Calf Circumference: 9-3/4 in (capri line)

Thigh Circumference: 15-5/8

Waistband Height: High: 5 in Mid: 3-3/4

Waistband Width: 28-1/4

Pocket Size: 7-1/2×4

Extra Options: Cross Cuff/Waistband pocket/5 lengths

Types of Waistbands: Mid/High

Dislikes: No thigh/calf measurements. I would add a little calf ease next time.

Size Range: Hip 32-50 sizes are being expanded

Gusset: Oval

Comments: Strides have always been my go to I love the accent piece on the back. Through trying all the different patterns and seeing the different amounts of ease throughout the strides are a pair that I would wear for working out but would pick something a little more relaxed for everyday wear. I do think the back on these is the most flattering especially for those with long butt problems like me LOL.

P4P Peg Legs

Stretch Required: 50%

Size made: XL waist L hip low rise, 1″ longer than capri length, contour waistband

Drafted Height: 5’6

Calf Circumference: 10-1/2

Thigh Circumference: 17-1/8

Waistband Height: Contour front: 7 in Regular: 3-1/2 in

Waistband Width: 25-1/4

Pocket Size: 6×4

Extra Options: Side pocket/colorblocking/waistband pocket/4 lengths

Types of Waistbands: Mid/High/Contoured

Dislikes: No print layout

Size Range: Hip: 33-58

Gusset: Oval with more pronounced oval on one side

Comments: Overall this pattern has some amazing options for being a free pattern. Lots of people really love the contoured waistband and choose to add that on to their legs of choice. I don’t love how the contour waistband goes down so far in the front, possibly from pregnancy being so fresh, I think it accentuates that part of me. This pattern did provide the best front crotch curve for my body and the back is pretty flattering too. For anyone’s first pair of leggings I think this is a great starting point and it’s FREE.

5004 Ninjas

Stretch Required: 50%

Size made: S->M waist L hip mid rise ankle length

Drafted Height: Based on inseam for lengths

Calf Circumference: 11

Thigh Circumference: 17-3/4

Waistband Height: 2

Waistband Width: 28

Pocket Size: Waistband pocket 2-1/4×3-3/4

Extra Options: 4 rise options/7 lengths/key waistband pocket

Types of Waistbands: Fabric or exposed elastic

Dislikes: No waistband options

Size Range: Hip: 34-61

Gusset: Diamond

Comments: I love these pants. They don’t move around AT ALL. I wore them for a really long run and they didn’t chafe or move around at all. I also really enjoy that they have no side seam I think it makes them look more seamless. I would wear these to run everyday, the minimalness of the waistband makes them super easy to wear under my running vest. If I was going to wear them for everyday I would look into adding a contour waistband probably from the strides. This is my second 5004 pattern and I’m not sure why I haven’t made more I love these just as much as the jessie!

Jalie Claras

Stretch Required: 60%

Size made: X ankle length

Drafted Height: Trunk height per size

Calf Circumference: 10-1/4

Thigh Circumference: 15-7/8

Waistband Height: Elastic: 3/4 in Fabric: 2-3/4 in

Waistband Width: 29-1/2

Pocket Size: None

Extra Options: 3 lengths

Types of Waistbands: Elastic or fabric

Dislikes: None

Size Range: Hip: 22-53

Gusset: Triangle

Comments: I love that it includes kids and adults sizes and that there is only one seam in the waistband. Not having any outer leg seam or front seam. The inseam sits forward though because of no front seam. These are SUPER fast to work up and I will definitely be wearing them again.

We all need to take a minute to giggle at my posture in all these side pics sometime’s I’m up straight sometimes I’m still pregnant LOL.

Review

My favorite pants for running were the 5004 Ninjas, I went for a 9 mile run and didn’t have to adjust them at all. I like how the waistband on these is really minimal so when wearing under my running vest I didn’t have any bulkiness. Although I love these for running I wouldn’t wear them for everyday as I don’t think they’re the most flattering. I am curious how they’d look adding the strides waistband too them and if that would help them be ‘cuter’. For my next pair I would like to do the pegs crotch curve, it looks like it fits me the best with the back of the strides. I am really tall and have been pregnant for three years (actually) so my booty is more deflated than it used to be. I think the accent piece on the strides give me the most flattering backside.

The Jalie Claras have a higher required stretch than the other patterns which is something to note and are the only pair that don’t have a from crotch seam. If you find that point usually is irritating for you then definitely try these. They are really comfortable and I will be wearing them again.

Negative ease: When the garment is finished smaller than your body measurement. With the supplex the garment is much smaller than your body measurements because it has such great stretch and recovery. This is a list of the patterns from least to most negative ease so the patterns at the top stretch less to fit you (aren’t as tight) as the patterns towards the end of the list.

Waistband Width Negative Ease Least -> Most

Jalie – 29

Strides – 28-1/4

Ninjas – 28

DIBY – 27-1/4

Pegs – 25-1/4

MyFit – 25

Thigh Negative Ease Least -> Most

MyFit – 21-1/8

Ninjas – 17-3/4

Pegs – 17-1/8

DIBY – 16-1/4

Claras -15-7/8

Strides -15-5/8

Calf Circumference Negative Ease Least -> Most

MyFit – 14-3/8

DIBY – 11-1/4

Ninjas – 11

Pegs – 10-1/2

Claras -10-1/4

Strides – 9-3/4

Crotch curves of all the patterns

I hope this helps!

-Whit