Transitional Outerwear: A lightweight LoneTree Vest using Stretch Twill

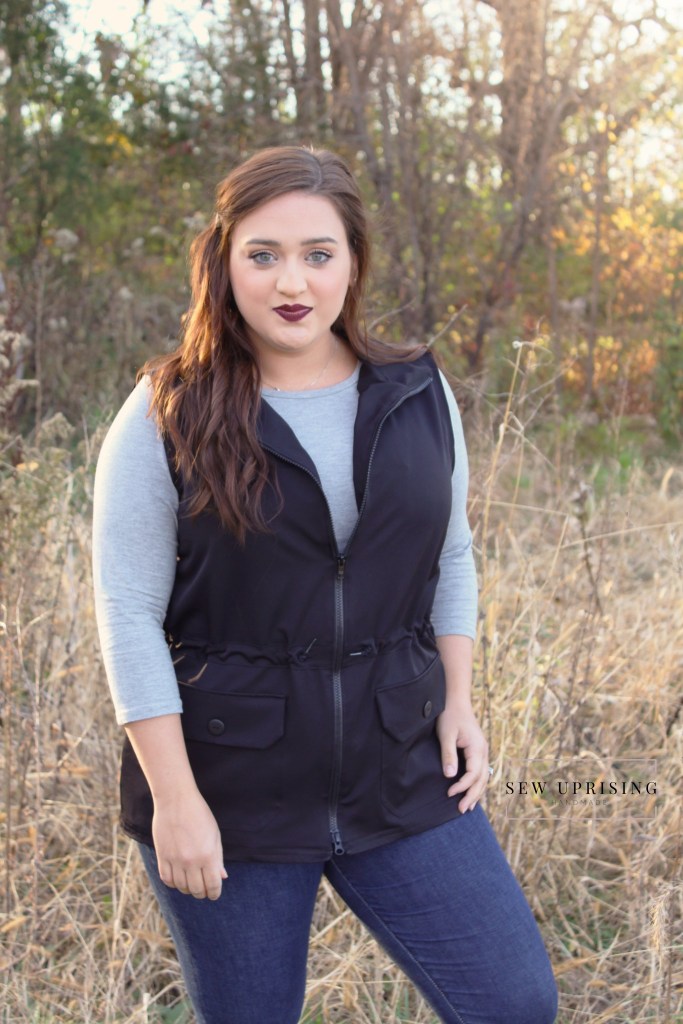
I am a cold weather person through and through. Long sleeves, high necks, big scarves, and bundling up are some of my favorite things and when the weather turns colder nothing gets me more excited than layering as many me-mades on my body at one time as possible. Last year I made a handful of jackets. This year it was time to branch out just a little bit farther and make a vest!

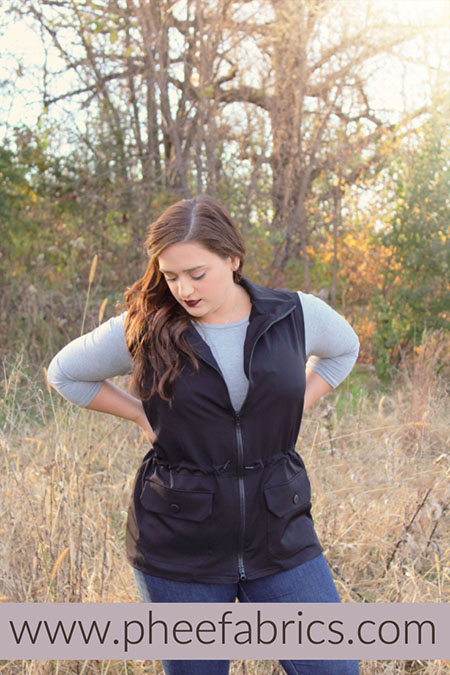
I found this LoneTree Jacket. It ranges in size XS – 4X, comes in vest or jacket versions and drafted for Stretch Twill. Phee Fabrics introduced this fabric base in the spring of 2019. It has a slight 4 way stretch, is moisture wicking, quick drying, great drape without losing it’s shape, wrinkle resistant and machine washable. While using it for summer sewing I couldn’t wait to see how it would transition into fall sewing.

I worked it up in the Black Stretch Twill (other colors are also available. Check them out here). I adored how quick and easy it was to put together. Unlike with the jacket version of this pattern I did not need any alterations for the vest version and made a straight size XXL (my measurements are 44,34,45).

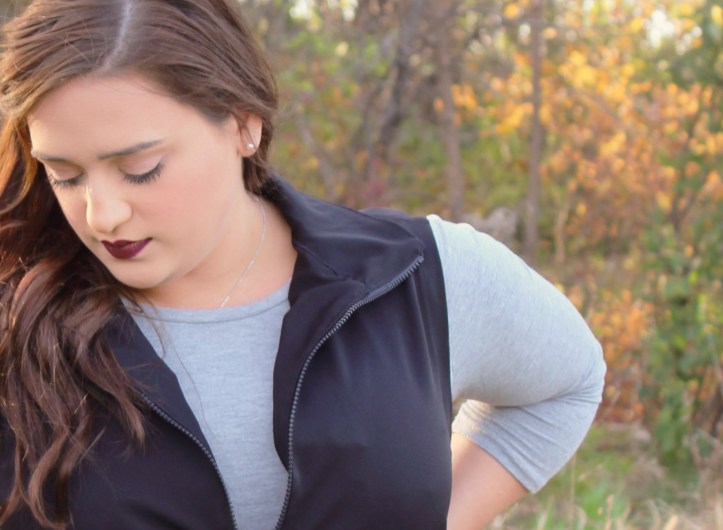
I did choose to leave off the upper pockets because my boobs are large enough and we dont need any additional fabric or attention in that area!

If you haven’t gotten a chance to sew with the Stretch Twill from Phee Fabrics yet, it is one of the easiest woven fabrics I have had the pleasure to sew with. Normally I am a knit person and have at least twenty garments hanging in my closet made out of the Phee rayon spandex. I typically avoid sewing woven patterns if at all possible. Woven fabrics don’t stretch like knits. The fit in knits tend to be more forgiving, Phee Fabrics stocks plenty of high quality knits, make sure to check them out. Woven’s usually require zippers, which I abhor. We all have our thing, amirite?

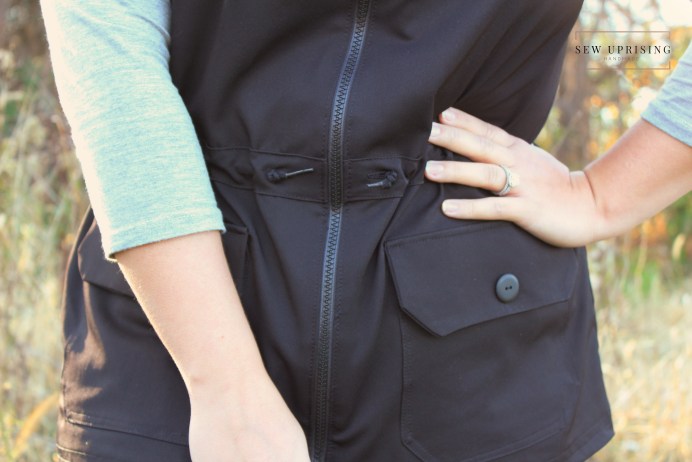
The Phee Stretch Twill has a 4 way stretch of 10% in each direction. Which means it is much easier to fit garments made out of it! It also sews and presses like a dream which makes the fiddly construction of things like this vest easy and painless.

When I first made this pattern I jumped right in with the full jacket version and had a bit of a time trying to fit the sleeves for me and it put me off from the pattern altogether for a while. If you are new to sewing, interested in a beginner outerwear pattern then I definitely think this vest is the way to start! Plus, the drawstring waist makes this one easy to fit, which I think also makes this a great first outerwear piece.

Happy sewing!

The Sly Little Fox and How She Got Pockets

I made the mistake of scrolling through my patterns and letting my 3 1/2-year-old daughter see the Stitch Upon a Time Riding Hood. She typically doesn’t request items for herself but immediately claimed this pattern as her own and decided she neeeeeded one. I’ve always wanted to make a cute animal poncho for her so between the Cozy French Terry from Phee Fabrics and the Riding Hood poncho. I decided it would be the perfect opportunity to ease into the fall with a piece of warm outerwear.

PheeFTFoxLogo-24

Here in beautiful Northern California it may be Fall with a slight crispness in the morning air but during the day it’s still over 80°. I really feel that this foxy little hood is going to be perfect to toss on in the mornings while loading in the car seat and quick to toss in the backpack after it starts to warm up.

I already had my heart set on the Riding Hood but also wanted a fox theme. I searched for the perfect pattern for the ears and tail since I lack creativity when it comes to doing things freehand. I ultimately decided on the Twig and Tail Animal Hooded Scarf and modified the Stitch Upon A Time hood to accommodate ears. For the white I used the Phee Fabrics White Rayon Spandex. I made the tail removable for ease of using the potty.

I thought I had hit the jackpot when it all pulled together so I rushed in my excitement to have Z try it on!!!

“Does it have pockets?”

“No.”

“I can take this off now.”

… the sound of dreams deflating …

PheeFTFoxLogo-15

This exchange left me debating. Do I add pockets, lose this battle and risk finding rocks, Legos, acorns or who knows what in my dryer? Or do I win this battle by adding pockets and have my girl love it? Yep, there was no way out of adding pockets!!!

PheeFTFoxLogo-3

Since this Poveglia COZY French Terry from Phee Fabrics is already so soft and warm I opted for only one layer and hemmed around the bottom making pockets per the pattern instructions, not really an option so I had to improvise! I went ahead with the pocket facing and used my Cricut to cut a stencil for a sweet little heart pocket adding a girlie touch.

Once those magic pockets were added it was LOVE!!! Snaps make this easy on & off for her small hands and the ease of getting in & out of the car seat so much nicer on my back!

I think this is a winner!!!

Facing my Sewing Fear of Zippers

I never thought I’d be saying this but there are some things in the sewing world that scare me – like full stress and panic, clenched teeth, sweaty palms. So what do I do? I avoided them like the plague. And the one that really sets me into a tailspin – ZIPPERS!! Who knew something so innocent as a zipper could cause such angst!

In the past, I would seen a cute jacket or sweatshirt and there it would be, staring at me with it’s shiny teeth – the dreaded zipper! So I would do what any logical person would (absolutely not logical!) and first buy the pattern, print, tape and grade my size, buy oodles of @pheefabrics to make said project and finally stash it away for a future date when I would miraculously no longer fear the zipper.

The time finally has come – too many patterns sit sadly waiting to be sewn. I have wanted to make a jacket with @pheefabrics Supplex for the longest time. With fall creeping into the Northeast, I wanted to make one more than ever.  So first I headed to the Phee Fabrics Facebook group for moral support and then to this blog post on installing zippers on knits. 

IMG_20191005_145432

I was armed and figured if I was going to try and learn a new skill, I might as well go all in and found a pattern that had not one, not two but THREE ZIPPERS! The Evergreen Jacket from Hey June Patterns has a plethora of cool add-ons, but I was most interested in having a two tone affect with the bias zip and collar. I love the look of black, red and gold accents  – so cherry and black Phee supplex were the answer. 

I have never sewn a jacket, or any top for that matter, in @pheefabrics Supplex and now I feel like I have really been missing out! Phee Supplex is not only a game changer for leggings but also the exact weight and look I wanted in a jacket. It has a sporty feel and great weight for a seasonal transition piece. And since it’s not bulky, I can wear it throughout the colder months under my huge “I live in a cold place and on’t care if I look fashionable so I don’t freeze” winter coat 🙂

So off I went with my pattern and fabric, zippers and seam ripper (that got used far more than I care to admit) but I was determined. 

IMG_20191015_144934
Happy mid project progress selfie

Here’s what I found from my experience with sewing this jacket and zippers:

  1. DO NOT RUSH! If you have an appointment or are tired or stressed that day, it’s not the time to start on this project. I think jackets in general require some care and attention – after all these are more involved in construction than many of the other patterns I have sewn.
  2. In the same vein as above, take it SUUUUPPPERRR SLOOOWWW when actually working with the zippers. The entire project can be made on a regular sewing machine using a basic straight stitch (if you are using Supplex which does not fray). Do you see that little slider for speed on the needle, move it all the way to the far left (or the slowest speed possible on your machine.) This may seem a bit excessive, but even with it all the way down, the zippers will only take a few minutes to stitch in. This helps to prevent breaking needles (none were injured in the making of this jacket) and straight stitching.
  3. IMG_20191010_115727Use a zipper foot (if one is available)  – here is a close up of mine on my machine. If you do not own one, it may be possible to complete this jacket since the seam allowance is ⅜” but I would highly recommend trying to find one that will fit your machine. It really makes life easier.
  4. There is no such thing as too many pins. This really helps keep things straight and prevents the fabric from stretching and bunching when you are sewing.
  5. Make sure to read through the entire pattern first (this goes for any time you sew) – you can see here where I sewed the zipper into the wrong seam and had to rip EVERYTHING OUT! No fun!

I hope this helps you feel less intimidated by zippers and encourages you to try out something a bit more challenging – the result, in my opinion, is totally worth it!

-Liz-

*** Please note – This blog contains affiliate links to products that I love and trust, and know you will as well. By using these links you are helping to support me, with no additional cost to you, while I continue to inspire your sewing adventures***