
Have you ever peeped inside your basic t-shirts? Or, even your fancy button downs?
You may have noticed a piece of “tape” (fabric) that covers the seam from one shoulder, around the back neck band, and ending at the opposite shoulder. This tape basically spans the width of the upper shoulders.
Side note: I bet millions of you Phee-natics are pulling your shirts off right now checking for that tape! lol
Anywho, I thought it was a really luxe feature that could elevate all of our makes. But the more I dug into the topic, the more I learned about how truly functional this tape is!
According to Sewaholic Patterns:
The twill tape is added to strengthen the shoulder seams. In most knit tops with a set-in sleeve, the shoulder seams are cut along the horizontal grain, the stretchiest direction. This is great for getting stretch around the body, but we’ll want to stabilize the shoulder seams or they’ll stretch, sag or break.
Awesome, right?
And of course I couldn’t wait to try it out! But in lieu of twill tape (cuz let’s face it, who wants to make a trip in the Christmas shopping frenzy just for twill tape?), I just used a band of rayon spandex to cover my seams.

This particular project represents a lot of firsts for me: first time applying a shoulder/neck band tape, first time using Megan Nielsen patterns (which btw are drafted so beautifully that I almost lost my mind), and the first time finally using Phee’s freaking AH-MAZE-ING rayon spandex!
With this being the first time playing with shoulder tape, it’s still a bit wonky. But, I’ll give ya the details of what I did anyway (in spite of my perfectionism making me want to throw up).
How to Apply Shoulder/Neckband Tape
- If you don’t have twill tape on hand, you can use your fabric and a binding tape maker. I used the 1/2″ gidget. Although it’s typically used for wovens, the tape maker worked so beautifully with Phee’s rayon spandex. I didn’t have to starch or stabilize the fabric at all. I used this tutorial to guide me: Oliver and S. Be careful when ironing. I set my iron to its wool/silk setting and that was sufficient heat.

- I used my overlocker for all of the seams. If you’re an overlocking kinda gal (or bro), here are some tips:
- Serge your shoulder seams together. When you apply your neck band, make sure both shoulder seams point toward the back.
- If you intend to topstitch your neckband with a coverstitch machine or twin needle, topstitch before applying the tape. It is only necessary to topstitch the front collar from shoulder seam to shoulder seam.
- Give your shoulder seams and collar a quick press.

- Before setting in the sleeves, apply the tape. I used my sewing machine and a standard straight stitch to apply the shoulder/neck band tape.
- Make one side of the tape follow the serged edge all the way through the shoulder, around the back neckband, and finally through the other shoulder. Straight stitch the ensemble together approximately 1/16″ away from the tape’s edge.

- Finally, straight stitch the tape’s free edge making sure it covers the seam.
- Bonus: I couldn’t have made this work without my walking foot. My MVP.
- Make one side of the tape follow the serged edge all the way through the shoulder, around the back neckband, and finally through the other shoulder. Straight stitch the ensemble together approximately 1/16″ away from the tape’s edge.
I didn’t achieve the prettiest application, but it will take some practice especially with navigating the shoulder and neckband joint. I guess that just means I’ll need more rayon spandex 😉

About the Pattern
The MN Briar tee comes in two lengths both featuring a hi-low hem line. I opted for a long sleeved crop top.
This pattern was super quick to make. The time consuming thing was adding the shoulder/neckband tape.
Like I said earlier, this is the first time I ever used a Megan Nielsen pattern. I can’t express enough how impressed I am by the drafting! It was almost too pretty to cut.
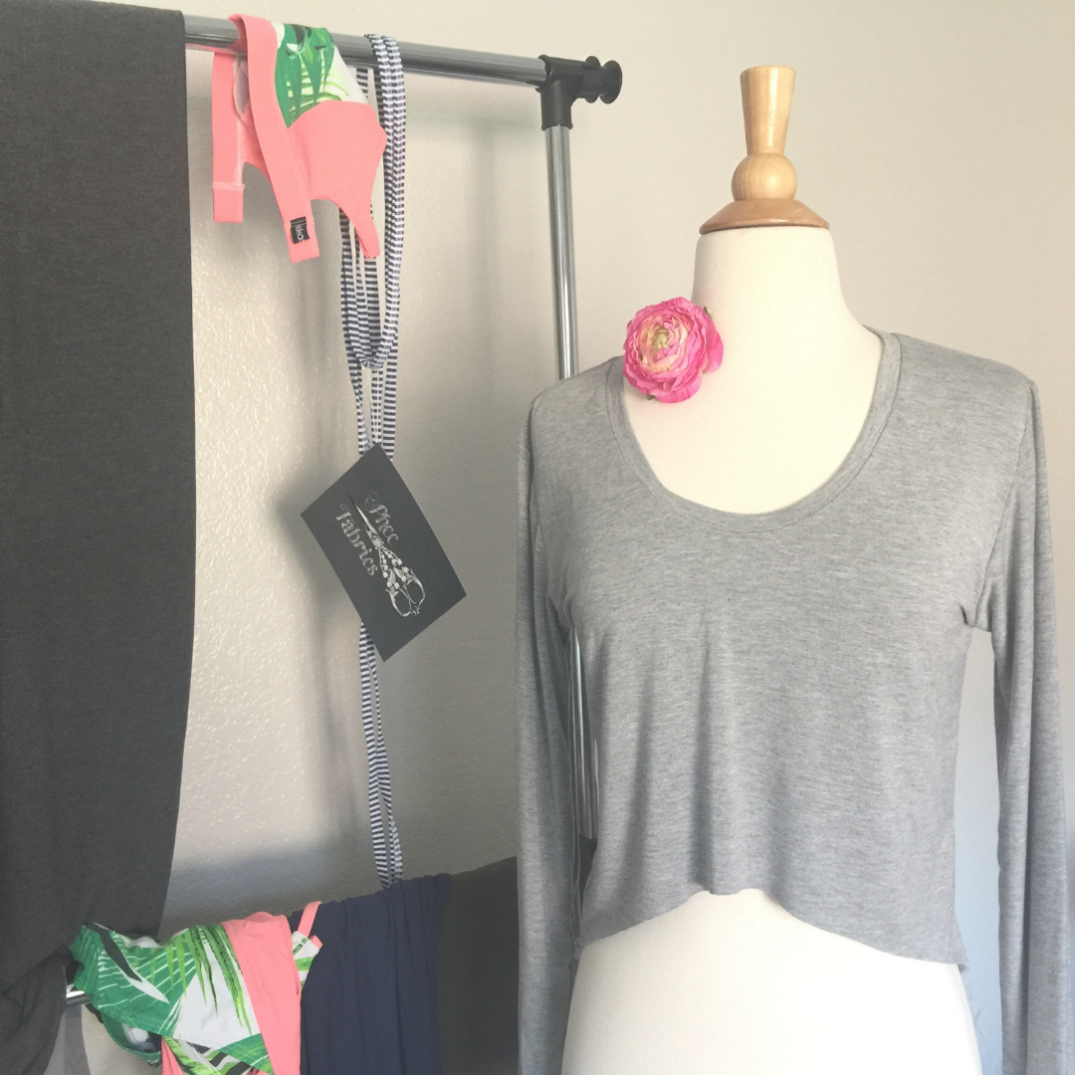

For now, I’m leaving the hem raw. I didn’t want to interrupt the beautiful drape. Did I mention how scrumptious and soft Phee’s rayon spandex is?!
I can’t believe I waited so long before using RS!
xoxo,
Monica

